![Primary.svg]](https://help.studyforge.net/hubfs/Primary.svg)
1. From the hamburger menu, Click "Create New Reading".

2. You will be able to see the new text editor in the reading creation form.

3. You can undo text actions by clicking the undo/redo buttons.

4. The new text editor also include text formatting such as Bold text and Italic text.

5. You can format the text alignment as desired, by clicking left, centered or right alignment from the menu.

6. Numbered or Bullets lists are also available in the new text editor.

7. You can edit the reading source code by clicking the Source code button.

8. The source code window shows the parameters of the entered text in a HTML format.

9. Links are also available to add to the reading by clicking the link button.

10. Complete the fields to add a URL, fields include: URL, text to display, title, and open URL options.

11. You can add tables by clicking the table button.

Learn more on table features in: How Do I Add Tables to Readings?
12. You can add CSS styling to the readings by clicking the CSS button.

13. Add the desired style in the input box and click Submit

14. All CSS styling changes will be visible in the Preview window.

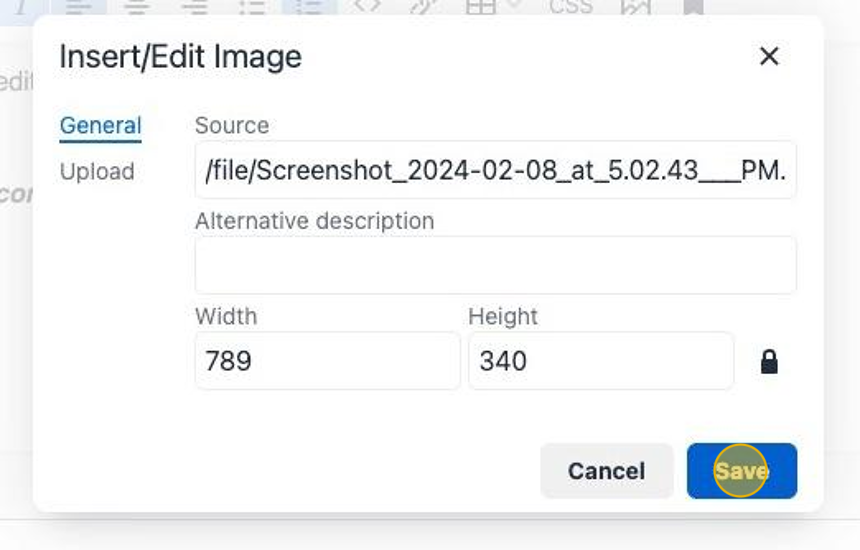
15. You can upload images to the reading by clicking the images button.

16. From this window, you can upload images, add an alternative description and modify the size of the uploaded image.

17. After uploading the image. Click "Save" to add an image to the reading.
18. Remember to click Create or Update in order to save the changes to the reading.
