![Primary.svg]](https://help.studyforge.net/hubfs/Primary.svg)
1. You can customize the navigation bar by clicking Edit Details from the Course Builder page.

2. Scroll down on the page until you get to the Student Navigation option.

3. From this drop-down list, You can select the default navigation bar, create a customized navigation bar, or remove it.

4. You can select the default navigation bar by selecting Default Navigation Bar from the list.

5. You can customize a navigation bar by selecting Custom Navigation Bar from the list.
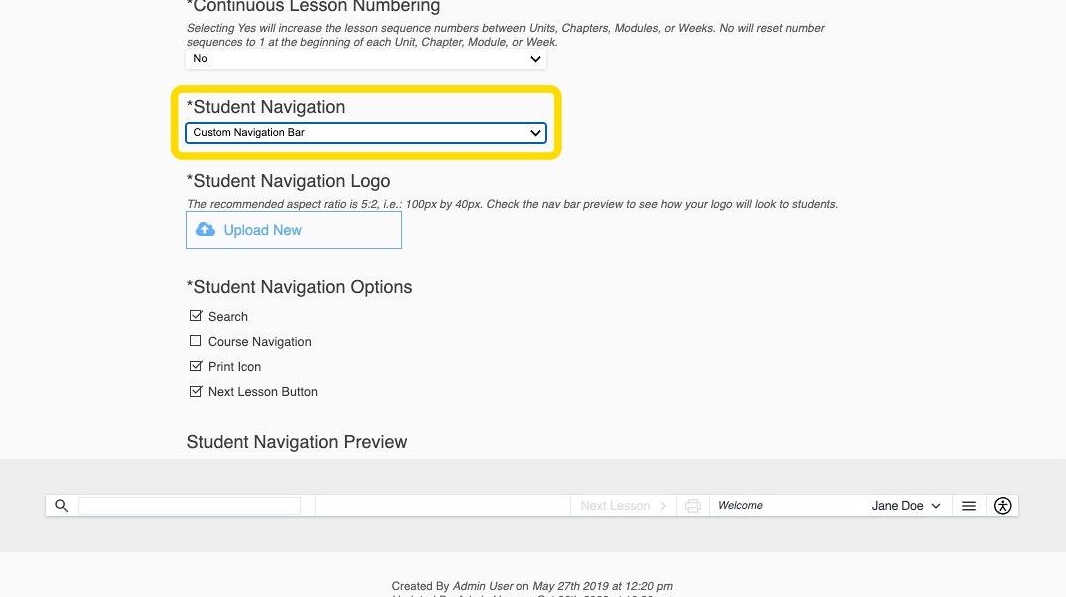
6. You can upload an logo for the student navigation bar by clicking Upload New. Be aware of the recommended aspect ratio of the image.

7. From the Student Navigation Options, You can add/remove the search from the student navigation bar by clicking/unclicking the Search option.

8. You can see all changes applied in the Student Navigation Preview image.

9. You can add/remove the course navigation controls by checking/unchecking the Course Navigation option.

10. You can add/remove the print icon for the student navigation bar by checking/unchecking the Print Icon option.
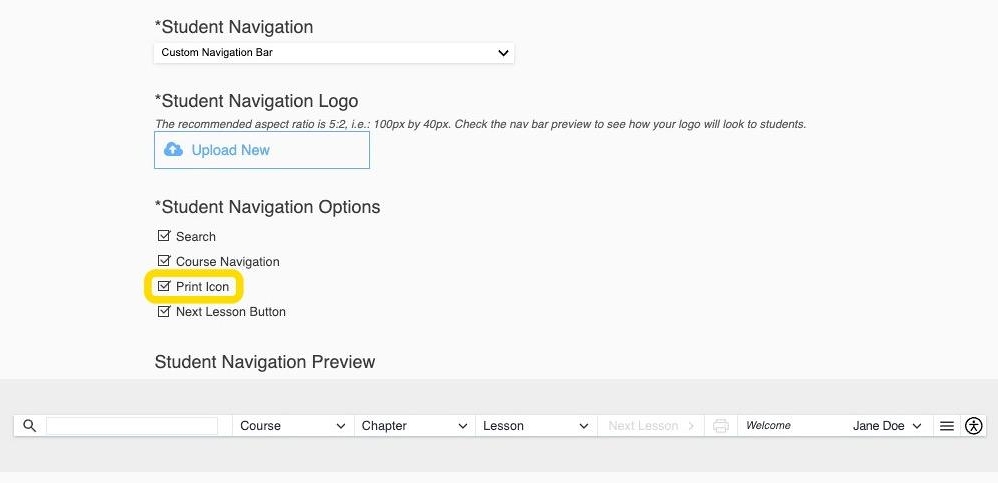
11. You can add/remove the next lesson button by checking/unchecking the Next Lesson Button option.

12. You can remove the navigation bar by selecting No Navigation Bar from the list.

13. Remember to click Save Details or Save Details and Edit Content to save the changes made to the Navigation Bar.

Your new nav bar will display by default to any group associated with your course!