How do I add the new orientation links to my course?
If the current course you’re using doesn’t have the new orientation links, we’ve got you covered. You can always install the newest version of the course, but if that isn’t an option for you, we’ll show you step-by-step how to add them.
Click on the link for the LMS you're using.
LTI 1.1 Legacy Users
If your LMS is using LTI 1.1 (Legacy). Please email support@studyforge.net with the following:
- LMS
- Course(s)
We will send you the specific Orientation links for your courses and instructions for your LMS on how to add them.
D2L Brightspace
Log in to Brightspace and navigate to the course where you want to add the links.
- Click on Content.
- Select the Unit/Chapter where you want to add the Orientation links.
- Click on Add Existing.

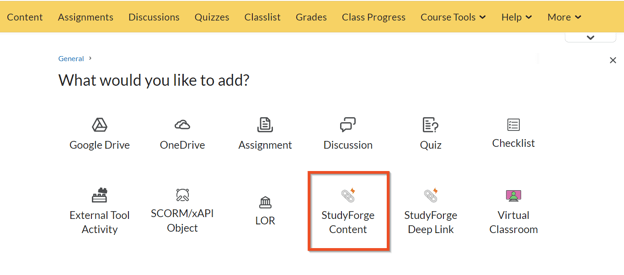
Look for an option either called StudyForge LTI 1.3, StudyForge Content or StudyForge Deep Link and click on it.
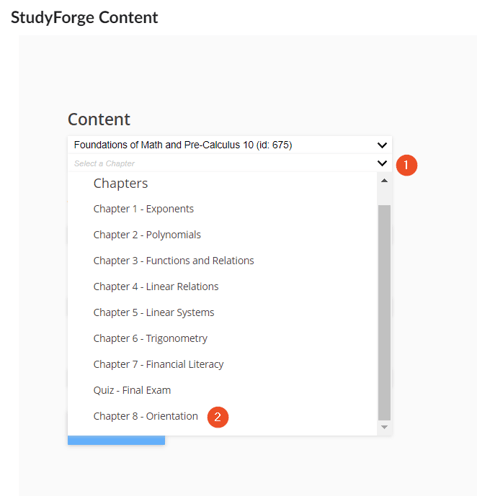
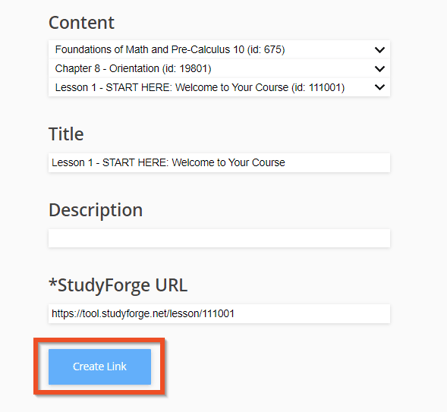
- Click the Select a Chapter/Unit down arrow and scroll down to the last chapter/unit.
- Click Orientation.
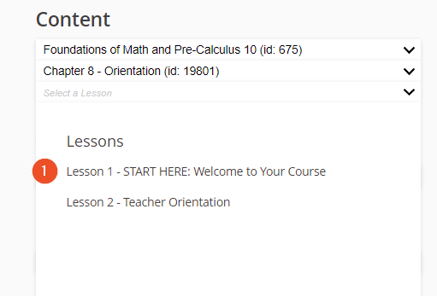
- Select Lesson 1 - START HERE: Welcome to Your Course.
Click Create Link
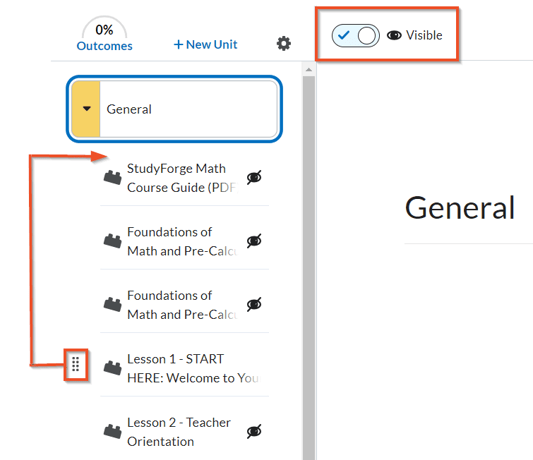
- Drag and drop the lesson to the top of the Chapter/Unit, as this is the first thing you want your students to do.
- Click on the lesson and make sure the Visible button is clicked on. You’ll know it’s visible when there is a blue check mark.
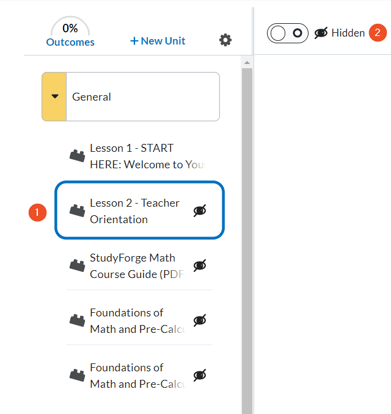
Repeat this process to add Lesson 2 Teacher Orientation, but keep this lesson hidden.
- Once the lesson has been added. Click on the lesson.
- Click the Visible button off. It will change to Hidden.
Canvas
- Log in to Canvas and navigate to the content page of the course where you want to add the links.
- Select the Unit or Chapter where you want to add the Orientation links.
- Click the + button
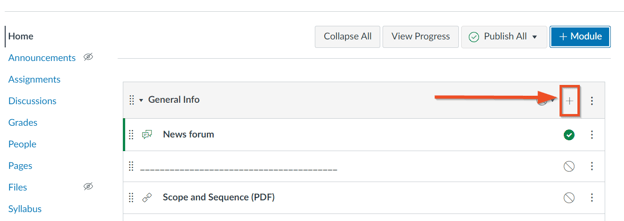
Click the dropdown menu and select External Tool.
Click Link to StudyForge.
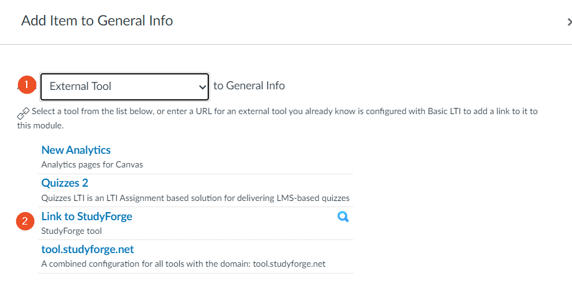
- Click the Select a Unit/Chapter down arrow and scroll down to the last unit/chapter.
- Click Orientation.
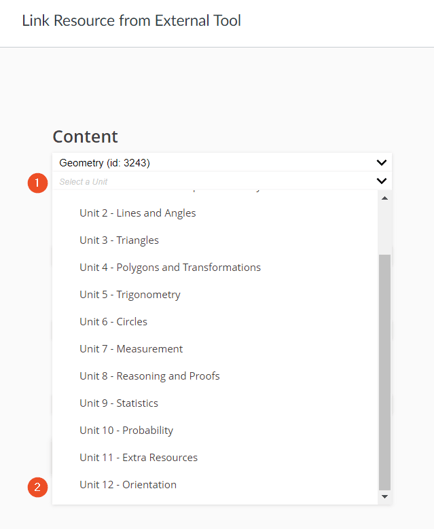
Select Lesson 1 - START HERE: Welcome to Your Course
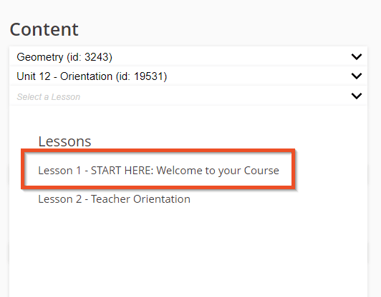
Click Create Link.
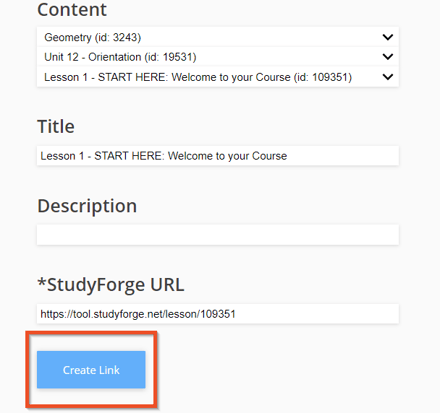
Click Add Item.
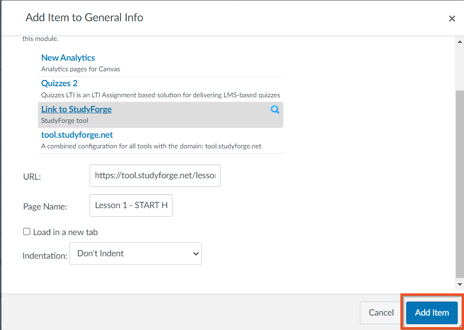
Drag and drop the lesson to the top of the Unit, as this is the first thing you want your students to do.
Change this lesson from unpublished to published by clicking the circle to the right of the lesson. It will change to a green checkmark when published.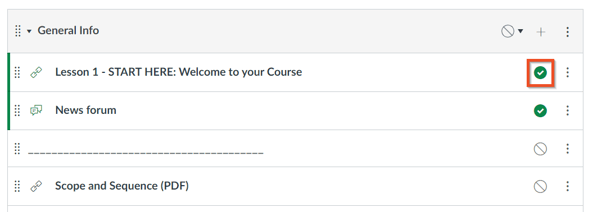
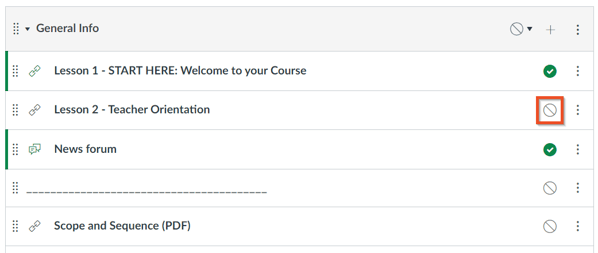
Repeat this process to add Lesson 2 Teacher Orientation, but keep this lesson hidden.
Moodle
Log in to Moodle and navigate to the content page of the course where you want to add the links.
Select the Unit/Chapter where you want to add the Orientation links.
Click on the Edit Mode button.
Scroll down to the bottom of the unit/chapter and click the + button.
Click External tool.
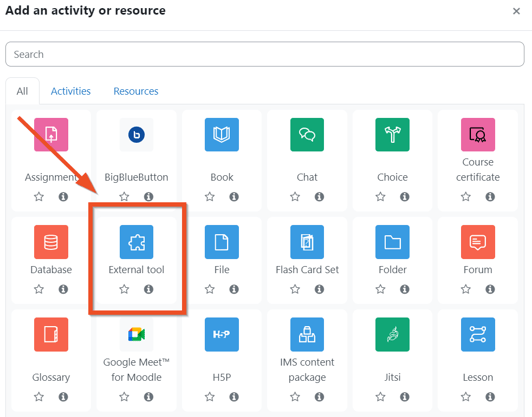
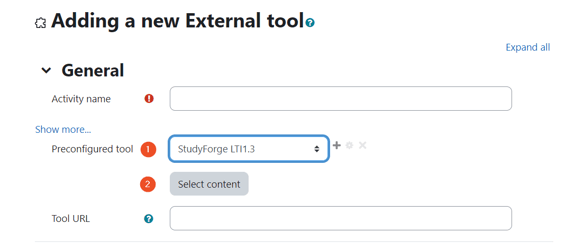
- In the Preconfigured tool down arrow, select StudyForge LTI1.3
- Click the Select content button.
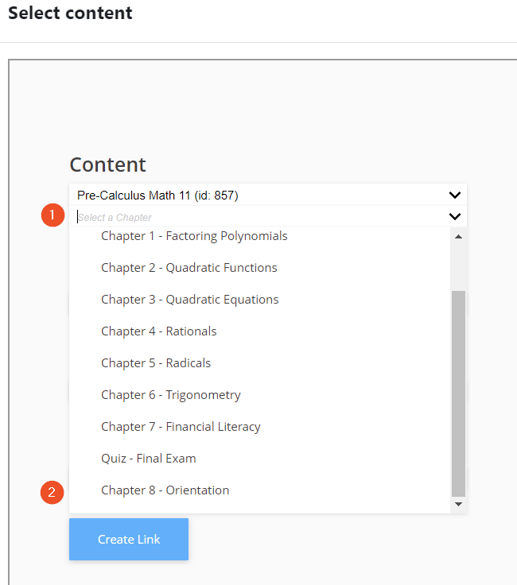
- Click the Select a Chapter/Unit down arrow and scroll down to the last chapter/unit.
- Click Orientation.
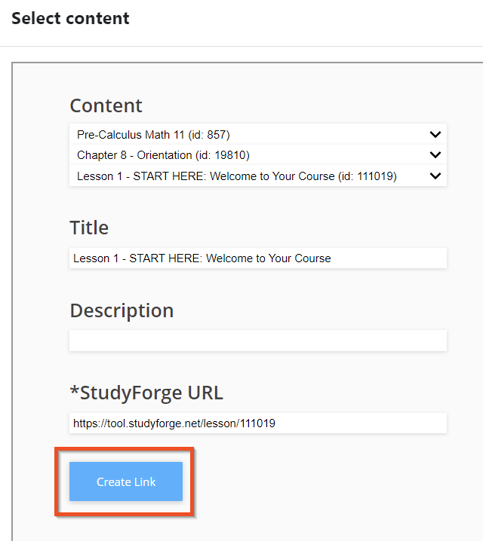
Click Create Link.
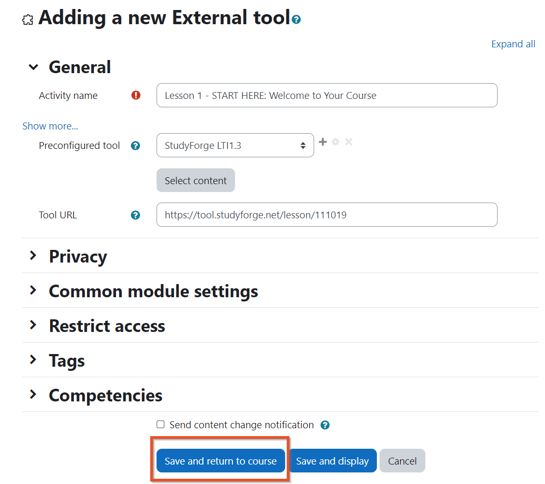
Click Save and return to course.
Drag and drop the lesson to the top of the Unit, as this is the first thing you want your students to do.
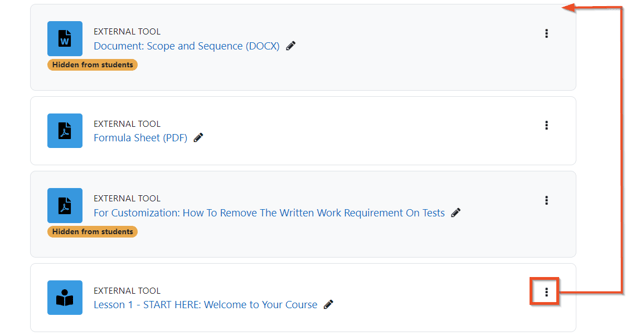
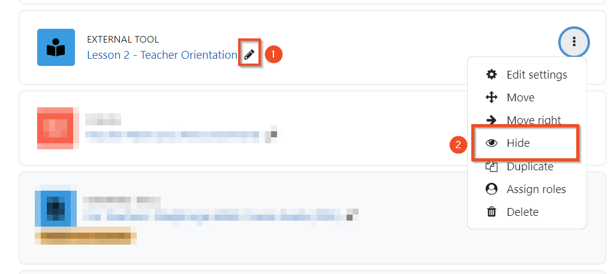
Repeat this process to add Lesson 2 Teacher Orientation, but keep this lesson hidden
